Sunday, February 2, 2025

Build a Rustic Country-style Wooden Piece with These Plans

Building Your Dream Rustic Country-Style Wooden Sideboard

Hey there, fellow crafters! So you're thinking about building a rustic country-style wooden piece? Fantastic! It's a super rewarding project, and the end result? Pure rustic charm you can be proud of. I'm going to walk you through building a sideboard, but honestly, this could be adapted for a coffee table, a TV stand, or even a bench. Let's get started!

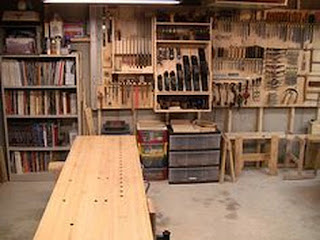
Gathering Your Materials: The Heart of the Project

Before we even think about picking up a saw, let's talk materials. Choosing the right wood is crucial for that authentic rustic look. Now, you can splurge on reclaimed barn wood if your budget allows – that stuff has character! But perfectly good, affordable lumber from your local home improvement store will work just fine too. Just remember, the beauty of rustic is in the imperfections.

The Wood You'll Need:

For this sideboard (adjust quantities based on your desired size):

  • Four long pieces for the sides (approx. 4ft x 12 inches x 1.5 inches, depending on your desired height)
  • Two shorter pieces for the top (approx. 4ft x 12 inches x 1.5 inches)
  • Two shorter pieces for the bottom shelf (same dimensions as the top)
  • Several pieces for the shelf supports (approximately 12 inches x 2 inches x 1.5 inches – you'll need at least four)
  • Wood for the legs (4 pieces of 2x4s, around 24 inches long is a good starting point)
  • Optional: Smaller pieces for decorative accents or extra shelving.

Pro-Tip: When choosing your wood, look for pieces with knots, interesting grain patterns, and maybe even some natural weathering. This is where the "rustic" really shines! Don't be afraid of imperfections; embrace them!

Hardware and Other Essentials:

  • Wood screws (various lengths depending on the thickness of your wood)
  • Wood glue
  • Clamps (lots of them!)
  • Sandpaper (various grits, starting coarse and finishing fine)
  • Wood stain (your choice of color – think warm browns, grays, or even a natural finish)
  • Wood sealant or polyurethane (to protect your masterpiece)
  • Measuring tape
  • Level
  • Drill
  • Saw (circular saw or hand saw, your preference)

Building the Frame: The Foundation of Your Sideboard

This is where the magic happens! We'll start by assembling the basic frame of your sideboard. Take your time, measure twice (or thrice!), and don't rush this part. A sturdy frame is key to a beautiful finished piece.

Assembling the Sides:

Using wood glue and screws, attach the shorter top and bottom pieces to the longer side pieces. Make sure everything is square and level using your clamps. Leave the clamps on for at least an hour to allow the glue to set properly. This forms your main side structures.

Adding the Shelf Supports:

Now, we'll add those shelf supports. Measure carefully where you want your shelves to be positioned. Attach the supports securely to the inside of the side structures, ensuring they're perfectly level. Again, glue and screws are your best friends here.

Joining the Sides:

Once the supports are in place, carefully join the two side structures together, using glue and screws. This will create the basic box shape of your sideboard. Make sure the top and bottom are perfectly aligned. Clamps are crucial at this stage.

Adding the Finishing Touches: The Rustic Charm

With the frame complete, it's time to add those special touches that will make your sideboard truly unique. Remember, this is where you can really let your creativity shine!

Adding the Top and Bottom:

Carefully set the top and bottom pieces onto the frame. If your top and bottom pieces are slightly oversized, you can adjust them to fit snuggly, or even use a flush trim bit on your router for a cleaner look. Use glue and screws to secure them to the frame.

Attaching the Legs:

Finally, attach your legs! You can use simple brackets to secure the legs to the frame for a nice sturdy base. Once the legs are secured, your sideboard structure is complete!

Sanding and Finishing:

This is the step that transforms your rough-hewn wood into something truly beautiful. Start by sanding all surfaces thoroughly, starting with coarse sandpaper and gradually moving to finer grits. This will give you a smooth, even finish. Apply your chosen wood stain according to the manufacturer's instructions, allowing ample drying time between coats. Finish it off with a coat (or two) of sealant or polyurethane to protect your beautiful creation from spills and wear.

Commonly Asked Questions

I've been there, done that – so I know you're going to have questions. Here are a few common ones:

Can I use different types of wood?

Absolutely! The beauty of rustic is its flexibility. Experiment with different types of wood – pine, cedar, oak – to find your perfect look. Just keep in mind that different woods will have different grain patterns and may require different finishing techniques.

How important is it to use clamps?

Extremely important! Clamps ensure that your joints are tight, preventing gaps and ensuring a sturdy structure. Don't skimp on the clamps – invest in a good set to make this process much smoother and accurate.

What if my wood isn't perfectly straight?

That's the beauty of rustic! Embrace the imperfections. Minor imperfections in your wood will simply add to the character of your piece.

Can I add drawers or doors?

Definitely! Once the basic frame is built, adding drawers or doors is perfectly feasible. You'll just need to plan that step in before you start assembling the frame and you might need to adjust the shelf placement.

There you have it! Your journey to building a stunning rustic country-style wooden sideboard (or any other project you decide to adapt this for!) is underway. Remember to have fun, take your time, and don't be afraid to personalize it to reflect your own unique style. Happy building!

Essential Woodworking Tool Plans for Home Workshops

Essential Woodworking Tool Plans for Home Workshops

Stepping into the world of woodworking can feel daunting, but with the right tools and a well-organized plan, you can transform your home workshop into a haven of creativity. This article outlines the essential tools every home woodworker needs, along with suggestions for organizing your space and maximizing efficiency. Forget feeling overwhelmed; let's build your dream woodworking setup!

The Power Tool Essentials

Power tools form the backbone of any efficient woodworking workshop. Investing wisely in high-quality tools will pay dividends in terms of precision, durability, and safety. Start with these fundamental power tools, choosing models that suit your budget and project scope. Remember to prioritize safety – always wear appropriate safety glasses and hearing protection when operating power tools.

The Workhorse: The Circular Saw

A circular saw provides the muscle for ripping (cutting along the grain) and cross-cutting lumber. Look for a saw with a powerful motor and a robust blade for clean, accurate cuts. Consider a model with a laser guide for added precision. Proper blade selection is crucial; use different blades for different materials (e.g., fine-tooth blades for hardwoods, coarser blades for softer woods).

Precision and Detail: The Jigsaw

The jigsaw excels at intricate cuts, curves, and internal shapes. Its versatility makes it indispensable for creating unique designs and shaping components. Choose a jigsaw with variable speed control for optimal performance on different materials. Experiment with various blades to achieve the desired finish, from clean, straight cuts to intricate, detailed curves.

The Smoother: The Random Orbital Sander

Sanding is a crucial step in woodworking, refining surfaces to a smooth, professional finish. A random orbital sander efficiently tackles this task, leaving behind a uniform, swirl-free surface. Invest in a variety of sanding discs with varying grits to handle different stages of the sanding process, from rough shaping to fine polishing.

Hand Tool Heroes: Precision and Control

While power tools handle the heavy lifting, hand tools provide unmatched precision and control for finer details and delicate work. Don't underestimate their importance in achieving professional results.

The Essential Measuring Tools

Accuracy is paramount in woodworking. A high-quality measuring tape, combination square, and marking gauge are essential for transferring measurements accurately and efficiently. These tools ensure your cuts and joints are precise, resulting in a beautifully finished piece.

  • Measuring Tape: A sturdy, durable tape measure is a must-have for accurately measuring materials.
  • Combination Square: This versatile tool offers multiple functions, including marking precise angles and checking for squareness.
  • Marking Gauge: This allows you to mark consistent distances from an edge, perfect for creating uniform joinery.

Chisels and Mallet: Shaping and Refining

Chisels, combined with a mallet, are crucial for shaping, cleaning up joints, and creating intricate details. Invest in a set of chisels with various sizes and profiles to handle a wide range of tasks. A good mallet, preferably made of wood or rubber, will protect your chisels and provide the necessary force for clean cuts.

Organizing Your Workshop: Maximizing Efficiency

A well-organized workshop is a safe and productive workshop. Proper storage solutions keep tools readily accessible and prevent accidents. Consider using pegboards, tool chests, or cabinets to organize your tools and materials. Keep your workspace clean and clutter-free to maintain efficiency and prevent injuries.

By carefully selecting and organizing your woodworking tools, you'll lay a strong foundation for a rewarding and productive woodworking journey. Remember to prioritize safety and gradually expand your tool collection as your skills and projects grow. Happy woodworking!

Saturday, February 1, 2025

Custom Aquarium Furniture for Creating a Beautiful Display Piece

Transform Your Aquarium into a Stunning Focal Point with Custom Furniture

Forget generic aquarium stands; elevate your aquatic world with custom-designed furniture that transforms your tank from a simple hobby into a breathtaking centerpiece. Imagine a meticulously crafted stand, perfectly sized and styled to complement your aquarium and your home décor. This isn't just about practicality; it's about creating a cohesive and visually stunning display that showcases your aquatic masterpiece and reflects your unique style. Custom aquarium furniture allows you to fully realize your vision, exceeding the limitations of mass-produced options and creating a truly personalized experience.

Designing Your Dream Aquarium Setup

The process begins with envisioning the perfect setting. Consider your existing décor: is your style minimalist, modern, rustic, or perhaps something more eclectic? The style of your chosen furniture should seamlessly integrate with your home's aesthetic. Think about the overall dimensions of your aquarium: a larger tank will demand a more robust and substantial stand. Custom design offers unparalleled flexibility. You can specify the exact dimensions, materials, and finishes to perfectly accommodate your tank and your space. Don't limit yourself to standard shapes and sizes; explore custom options like built-in lighting, discreet storage compartments for equipment, and even integrated water features.

Choosing the Right Materials

The materials you select significantly impact both the aesthetic appeal and the longevity of your aquarium furniture. Solid hardwood offers exceptional durability and a classic, sophisticated look. High-quality plywood presents a more budget-friendly option without sacrificing sturdiness. Consider the finish: a rich stain can enhance the natural grain of the wood, while a painted finish allows for virtually limitless color customization. For a more contemporary feel, explore the possibilities of sleek, modern materials like lacquered MDF or even metal. Remember to specify materials that can withstand the weight and potential moisture associated with an aquarium.

Crafting a Functional and Beautiful Stand

A custom-designed aquarium stand is more than just a platform for your tank; it's a functional piece of furniture that supports your entire aquatic ecosystem. The design should incorporate ample space for all necessary equipment, including filters, heaters, and other accessories. Think about the accessibility of these components for easy maintenance. Consider incorporating features like concealed compartments to keep cords and equipment neatly organized and out of sight. A well-designed stand maximizes space and functionality, keeping your aquarium setup both aesthetically pleasing and easy to manage.

Adding Personalized Touches

Let your creativity flourish! Custom furniture allows for unparalleled personalization. Integrate your aquarium seamlessly into your home's aesthetic by:

  • Incorporating custom carvings or inlays.
  • Adding unique hardware like sculpted knobs or handles.
  • Choosing a finish that complements your existing furniture.
  • Building in additional features like a built-in sump or a dedicated area for live plants.

Beyond the Stand: Complete Aquarium Furniture Solutions

Custom design extends beyond just the aquarium stand. Consider a custom-built canopy to house lighting and further enhance the aesthetic appeal. Matching side tables or shelves can provide additional display space for aquatic accessories or related décor. Imagine a cohesive unit, where the aquarium and its accompanying furniture harmonize beautifully to create a truly captivating focal point in your home. Custom design unlocks the potential for a truly unique and personalized aquatic environment.

Plans Woodwork: Step-by-Step Guides for Every Skill Level

Plans Woodwork: Step-by-Step Guides for Every Skill Level

The alluring scent of freshly cut wood, the satisfying rasp of a plane, the pride of crafting something beautiful and functional with your own two hands – woodworking offers a unique blend of creativity and craftsmanship. Whether you're a seasoned artisan or a complete novice, the world of woodworking welcomes you with open arms. This guide provides a roadmap, offering step-by-step instructions and project ideas for every skill level, empowering you to embark on your woodworking journey with confidence.

Getting Started: Essential Tools and Safety

Before you dive into your first project, gathering the right tools is crucial. For beginners, a basic toolkit suffices. Invest in quality over quantity, focusing on durable, reliable tools that will stand the test of time. This includes a hand saw, measuring tape, chisels (various sizes), a hammer, sandpaper (various grits), and a safety square. Remember, safety is paramount. Always wear safety glasses to protect your eyes from flying debris. Consider a dust mask to minimize inhalation of wood dust, particularly when working with hardwoods. Learn proper tool handling techniques to avoid accidents.

Essential Safety Precautions:

  • Always wear safety glasses.
  • Use a dust mask when sanding or cutting.
  • Keep your work area clean and organized.
  • Use clamps to secure your workpieces.
  • Never rush; take your time and focus on precision.

Beginner Projects: Building Confidence

Beginners often feel overwhelmed by the sheer variety of projects. Start with simple, manageable projects that build foundational skills and confidence. A simple shelf is an excellent starting point. You'll learn to measure accurately, cut wood precisely, and assemble pieces using basic joinery techniques. Another great project is a small birdhouse, requiring you to practice more intricate cuts and assembly. These projects introduce you to fundamental woodworking techniques without being overly demanding. Remember to choose readily available softwoods like pine for ease of cutting and shaping.

Simple Beginner Project Ideas:

  • A simple shelf unit
  • A small birdhouse
  • A wooden coat rack
  • A cutting board
  • A small picture frame

Intermediate Projects: Refining Your Skills

Once you've mastered the basics, it's time to tackle more challenging projects. Consider building a small coffee table, a more complex bookshelf, or even a simple chair. These projects introduce you to more advanced joinery techniques, such as mortise and tenon joints or dovetail joints. You'll also learn to work with different types of wood and finishes. Don't hesitate to consult online tutorials or woodworking books for detailed instructions and guidance. Pay close attention to detail and strive for precision in your cuts and assembly.

Intermediate Project Ideas:

  • A small coffee table
  • A multi-shelf bookcase
  • A simple chair (like an Adirondack chair)
  • A small wooden toy box
  • A decorative wall shelf

Advanced Projects: Unleashing Your Creativity

For experienced woodworkers, the possibilities are virtually limitless. You can design and build custom furniture, intricate carvings, or even entire structures. This stage involves pushing creative boundaries, experimenting with different techniques, and mastering advanced joinery and finishing techniques. Explore different wood species, finishes, and hardware to achieve unique and personalized results. Consider taking advanced woodworking classes or workshops to further refine your skills and learn new techniques.

Advanced Project Ideas:

  • A custom-built desk
  • Intricate wooden carvings
  • A full-size dining table
  • A handcrafted rocking chair
  • A custom-designed bookshelf

Woodworking is a journey of continuous learning and refinement. Embrace the challenges, celebrate your successes, and most importantly, enjoy the process of creating something beautiful and enduring with your own hands. Happy woodworking!